Indonesian Sugar Cookies

Earlier this week we had yet another bake sale at school so this time I decided to bake some sugar cookies! I adapted this from a recipe I found in this really great Indonesian cookbook (Kue Kering ala Nila Chandra- Joyce Aswan) which I would really recommend getting if you can read indo or have a really helpful Indonesian cousin visiting you  like I do (thanks Fiona!!! <333)
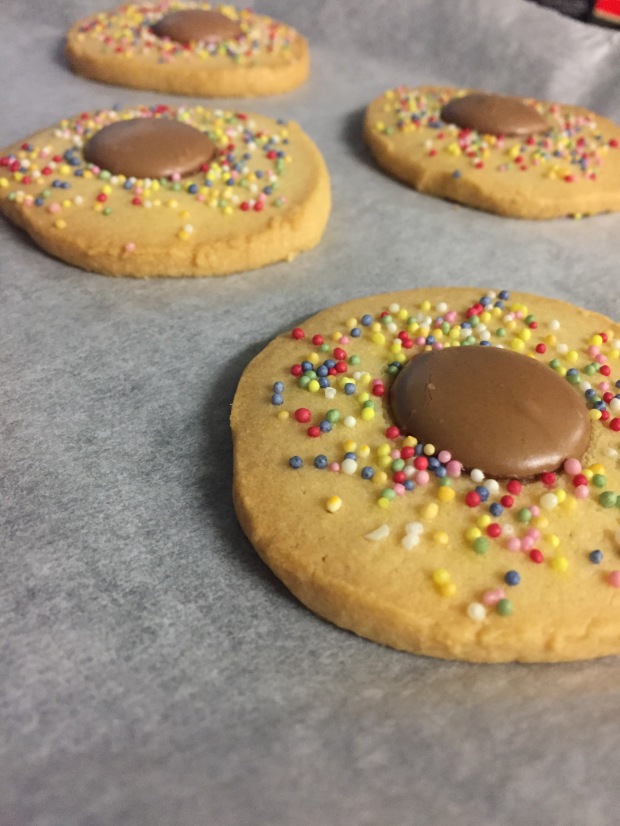
The cookie base is pretty traditional- it tastes quite buttery and the cookies are crumbly, basically they’re the ideal Indonesian cookie. With the addition of a chocolate button and some 100’s & 1000’s, they obviously get a little sweeter but I think that’s exactly what these cookies need. If you’re not a fan you can omit the chocolate and 100’s & 1000’s but maybe you should re-evaluate your life first…

If you give these cookies a go make sure you let me know how it goes and tag me on Instagram @LocknessDIY !!

– Vanessa

@LocknessDIY


Indonesian Sugar Cookies

Adapted from Kue Kering ala Nila Chandra

Yields: 20 servings

Ingredients:

  • 150g butter, at room temperature
  • 110g caster sugar
  • 200g plain flour
  • 30g cornflour
  • 2 egg yolks
  • 2 tsps vanilla essence
  • 10g milk powder
  • chocolate buttons x 20
  • 100’s & 100’s (or other sprinkles)

Directions:

  1. Beat the butter and sugar in an electric mixer until white. Add the vanilla essence and egg yolks, mix well.
  2. Add the dry ingredients, mix until combined. Form the dough into a log (about 7cm diameter), wrap in glad-wrap and refrigerate until firm (about 2 hours).
  3. Preheat oven to 160*C fan forced. Cut the dough into slices (about 0.4cm thick) and decorate with the chocolate and 100’s & 1000’s. Bake on a baking paper lined tray until slightly browned (about 20mins). Remove from oven and allow the cookies to cool for 5 minutes. Transfer to wire cooling rack.
  4. Enjoy!

White Chocolate-Dipped Snicker-doodles

3 days until Christmas and I’m so excited!! I thought that today I would share with you the recipe that I used for the cookies I gifted this year- White Chocolate Snicker-doodles.


Some of my favourite snicker-doodles are from “Mrs. Fields”, when they serve them all warm and they’re soft and kind of melt-y, it reminds me of Christmas no matter what time of the year it is. And they smell so good.


These snicker-doodles aren’t quite like that- they’re not served warm because to be quite honest it would be pretty difficult for me to keep them warm throughout the school day so to make up for the lack of warmth, they’re dipped in white chocolate!


These cookies are pretty simple to make, but make sure that you don’t place the cookie dough balls too close together otherwise you’ll end up with one big mush of a cookie and trust me, it’s pretty difficult to dip a baking tray sized cookie into melted white chocolate without making an enormous mess.

– Vanessa 

@LocknessDIY


White Chocolate-Dipped Snicker-doodles

Yields: about 50 cookies

Ingredients:

  • 3 cups plain flour
  • 1/4 tsp salt
  • 1 1/2 cups sugar
  • 1 cup unsalted butter
  • 2 large eggs
  • 1/2 tsp vanilla extract
  • 1/4 cup sugar
  • 2 tsp ground cinnamon
  • 500g white chocolate
  • Cinnamon sugar

Directions:

  1. Preheat oven to 180*C. Line baking sheets with baking paper.
  2. Using an electric mixer, beat the sugar and butter together until smooth and creamy (3 mins). Add the eggs and vanilla extract. Mix until combined. With the mixer on low, slowly add in the dry ingredients.
  3. Shape the dough into balls using about 1 teaspoon of dough. Combine the 1/4 cup sugar and the ground cinnamon. Roll the balls in the cinnamon sugar mixture. Place the balls 5cm apart on prepared baking sheets. Bake 8-10mins or until the cookies are set around the edges, and the centers are still soft.
  4. Remove from the oven and let cookies set on the baking sheet for two mins before transferring the cookies to a wire cooling rack to cool completely.
  5. Whilst the cookies cool, melt the white chocolate in a microwave safe bowl. Dip the cookies halfway into the chocolate, before placing them on wax paper. Sprinkle the cinnamon sugar over the white chocolate. Let cookies set until the chocolate is completely dry.

DIY: Hot Cocoa Cookies!

Today’s DIY is a recipe for cookies, because in my opinion nothing says Christmas like a big batch of cookies. In the northern hemisphere, it’s cold during Christmas which to me means that you guys get to drink hot chocolate 24/7 to ‘keep warm’, but here in Australia that isn’t really a think. In fact most people try to keep cool, so I’ve tried to put the joy and taste of Hot Cocoa into delicious cookies, that are significantly more weather appropriate. Here’s how to make them:

Ingredients:

  • 1/2 cup unsalted butter
  • 350g milk/dark chocolate (depending on how sweet you want your cookies)
  • 1 1/2 cups flour
  • 1/4 cup unsweetened cocoa powder
  • 1 1/2 tsp baking powder
  • 1/4 tsp salt
  • 1 1/4 cups brown sugar
  • 3 eggs
  • 1 1/2 tsp vanilla extract
  • approx. 25 large marshmallows cut in half

Method:

  1. In a microwave safe bowl, melt the chocolate and butter, stirring frequently. Once melted, set aside to cool.
  2. In a medium bowl, whisk together the flour, cocoa powder, salt, and the baking powder.
  3. In a large electric mixing bowl, beat the sugar, eggs and vanilla extract on a low speed until fully combined.
  4. Add the cooled chocolate mixture and blend until just combined.
  5. While mixing, add the flour mixture bit by bit and blend until just combined.
  6. Scrape down the sides of the bowl, then cover the dough (still in the bowl) with cling wrap and refrigerate for about one hour. (You want the cling wrap to be touching the dough). If making the dough a day ahead, let the dough sit at room temperature for 20-30 minutes before attempting to shape it. You might think the dough is a little wet and want to add a bit of flour. You can if you want, but the dough does become more dough like after you refrigerate it.
  7. Preheat oven to 160 degrees celcius fan force. Line a whole bunch of baking trays with baking paper. (Honestly you are probably going to need all the trays you own, and still have to do rotations) Use a tablespoon to scoop the cookies and roll the dough in your hands to create balls. Arrange the balls about 7cm apart on the baking sheets and then flatten slightly. You might think that 7cm is a lot, but trust me these cookies expand like crazy. I had one batch that ended up being one giant cookie because I didn’t space them out enough. Bake cookies about 12 minutes.
  8. Once the cookies have baked, remove them from the oven and press one marshmallow half into the center of each cookie. Return the cookies to the oven for another 3-4 minutes. Allow the cookies to cool for a few minutes then transfer to a cooling rack.
  9. At this stage, you can just leave the cookies as they are. They are still absolutely delicious, however you may wish to add a chocolate icing and sprinkles to make them a little more pretty.

That’s it!

Happy Holidays!

xoxo Maggie and Vanessa