Indonesian Sugar Cookies

Earlier this week we had yet another bake sale at school so this time I decided to bake some sugar cookies! I adapted this from a recipe I found in this really great Indonesian cookbook (Kue Kering ala Nila Chandra- Joyce Aswan) which I would really recommend getting if you can read indo or have a really helpful Indonesian cousin visiting you  like I do (thanks Fiona!!! <333)

The cookie base is pretty traditional- it tastes quite buttery and the cookies are crumbly, basically they’re the ideal Indonesian cookie. With the addition of a chocolate button and some 100’s & 1000’s, they obviously get a little sweeter but I think that’s exactly what these cookies need. If you’re not a fan you can omit the chocolate and 100’s & 1000’s but maybe you should re-evaluate your life first…

If you give these cookies a go make sure you let me know how it goes and tag me on Instagram @LocknessDIY !!

– Vanessa

@LocknessDIY


Indonesian Sugar Cookies

Adapted from Kue Kering ala Nila Chandra

Yields: 20 servings

Ingredients:

  • 150g butter, at room temperature
  • 110g caster sugar
  • 200g plain flour
  • 30g cornflour
  • 2 egg yolks
  • 2 tsps vanilla essence
  • 10g milk powder
  • chocolate buttons x 20
  • 100’s & 100’s (or other sprinkles)

Directions:

  1. Beat the butter and sugar in an electric mixer until white. Add the vanilla essence and egg yolks, mix well.
  2. Add the dry ingredients, mix until combined. Form the dough into a log (about 7cm diameter), wrap in glad-wrap and refrigerate until firm (about 2 hours).
  3. Preheat oven to 160*C fan forced. Cut the dough into slices (about 0.4cm thick) and decorate with the chocolate and 100’s & 1000’s. Bake on a baking paper lined tray until slightly browned (about 20mins). Remove from oven and allow the cookies to cool for 5 minutes. Transfer to wire cooling rack.
  4. Enjoy!

Coriander Lime Chicken w/ avo salsa

“Whether you call it coriander or cilantro, there’s no denying it, this herb splits people into two camps – love or hate. But why does such a humble herb create such havoc on your dinner plate? ” The other day I was reading this article by the SBS, and I started thinking about my experiences with coriander- I personally love it and after quickly checking with my family that no one else thought it tasted soapy, I decided I was going to try and cook something with coriander front and centre!

Now I’m not going to try and claim that even if you’ve always hated coriander once you try this you’ll change your mind, because apparently the reason you dislike coriander could be down to science. However, if you do like coriander then this may be the dish for you! The chicken is super tender and juicy, and the avocado salsa is honestly pretty great!

If you try out this recipe let me know in the comments below or tag me in a pic on Instagram @LocknessDIY 🙂

– Vanessa

@LocknessDIY


Coriander Lime Chicken w/ avo salsa on Turkish Bread

Yields: 4 servings
Total time: 40 mins

Ingredients:

  • 600g boneless chicken breast
  • rocket
  • turkish bread

Chicken Marinade

  • 1/4 cup lime juice
  • 2tbsp olive oil
  • 1/4 cup fresh coriander, coarsely chopped
  • 1/4tsp ground cumin
  • 1/2tsp salt

Avocado Salsa

  • 2 avocados, mashed
  • 1/2 cup fresh coriander, diced
  • 3tbsp lime juice
  • 1/2tbsp vinegar
  • 1/2tsp red chilli flakes
  • 1 clove garlic, minced
  • salt to taste

Directions:

  1. Place the ingredients for the chicken marinade into a bowl, whisk. Add the chicken and marinade to a large ziplock bag and let chicken marinade for 15mins.
  2. Whilst the chicken is marinading, combine the ingredients for the avocado salsa.
  3. Preheat a grill to medium-high heat or heat and oil a skillet. Place chicken on grill and grill each side for 4-6 minutes, until chicken is no longer pink. Remove and let sit for two minutes. Toast bread.
  4. Serve chicken with the rocket, avocado salsa, and toast.

White Chocolate-Dipped Snicker-doodles

3 days until Christmas and I’m so excited!! I thought that today I would share with you the recipe that I used for the cookies I gifted this year- White Chocolate Snicker-doodles.


Some of my favourite snicker-doodles are from “Mrs. Fields”, when they serve them all warm and they’re soft and kind of melt-y, it reminds me of Christmas no matter what time of the year it is. And they smell so good.


These snicker-doodles aren’t quite like that- they’re not served warm because to be quite honest it would be pretty difficult for me to keep them warm throughout the school day so to make up for the lack of warmth, they’re dipped in white chocolate!


These cookies are pretty simple to make, but make sure that you don’t place the cookie dough balls too close together otherwise you’ll end up with one big mush of a cookie and trust me, it’s pretty difficult to dip a baking tray sized cookie into melted white chocolate without making an enormous mess.

– Vanessa 

@LocknessDIY


White Chocolate-Dipped Snicker-doodles

Yields: about 50 cookies

Ingredients:

  • 3 cups plain flour
  • 1/4 tsp salt
  • 1 1/2 cups sugar
  • 1 cup unsalted butter
  • 2 large eggs
  • 1/2 tsp vanilla extract
  • 1/4 cup sugar
  • 2 tsp ground cinnamon
  • 500g white chocolate
  • Cinnamon sugar

Directions:

  1. Preheat oven to 180*C. Line baking sheets with baking paper.
  2. Using an electric mixer, beat the sugar and butter together until smooth and creamy (3 mins). Add the eggs and vanilla extract. Mix until combined. With the mixer on low, slowly add in the dry ingredients.
  3. Shape the dough into balls using about 1 teaspoon of dough. Combine the 1/4 cup sugar and the ground cinnamon. Roll the balls in the cinnamon sugar mixture. Place the balls 5cm apart on prepared baking sheets. Bake 8-10mins or until the cookies are set around the edges, and the centers are still soft.
  4. Remove from the oven and let cookies set on the baking sheet for two mins before transferring the cookies to a wire cooling rack to cool completely.
  5. Whilst the cookies cool, melt the white chocolate in a microwave safe bowl. Dip the cookies halfway into the chocolate, before placing them on wax paper. Sprinkle the cinnamon sugar over the white chocolate. Let cookies set until the chocolate is completely dry.

Greek Chicken Gyros

I don’t really eat Greek food that often, but when I do I really enjoy it, so I decided to make some! These Greek Gyros are not strictly traditional, but that certainly doesn’t detract from the flavour. They are made with what are considered “classic Greek” ingredients- oregano, yoghurt, lemon, and garlic.

The smell that comes off the chicken is incredible too. The oregano and garlic scents are pretty intense and as soon as my parents walked through the door after work they couldn’t stop talking about how great it smelled.

— Vanessa

@LocknessDIY


Greek Chicken Gyros

Yields: 3-4 servings
Total time: xxx mins

Ingredients:

  • 500g boneless skinless chicken thigh fillets
  • 3-4 pita breads or flat breads
Marinade
  • 3 small garlic cloves, minced
  • 1 1/2 tsp white vinegar
  • 1 1/2 tbsp lemon juice
  • 1/2 tbsp extra virgin olive oil
  • 1 1/2 tbsp Greek yoghurt
  • 1 tbsp dried oregano
  • 1/2 tsp salt
  • Black pepper
Tzatziki
  • 1/2 cucumbers (to make about ½ – ¾ cup grated cucumber after squeezing out juice)
  • 1/2 cups plain Greek yoghurt
  • 1/2 tsp white wine vinegar (or red wine or apple cider vinegar)
  • 1/2 tbsp lemon juice
  • 1/2 tbsp extra virgin olive oil
  • ½ garlic clove, minced
  • ½ tsp salt
  • Black pepper
Salad
  • 2 tomatoes, desseeded and diced
  • 1/2 cucumbers, diced
  • ½ red spanish onion, peeled and finely chopped (optional)
  • 1/8 cup fresh parsley leaves
  • Salt and pepper

Directions:

  1. Place the marinade ingredients into a ziplock bag and massage to mix. Add the chicken into the bag and massage to coat all of the chicken in the marinade. Marinate for at least 3 hours, but no more than 24 hours.
  2. Cut the cucumber in half lengthwise, use a teaspoon to scrape out the seeds. Save half of the cucumber for the salad. Grate the cucumber coarsely, then wrap in paper towel and squeeze out excess liquid.
  3. Place the cucumber and remaining tzatziki ingredients in a bowl. Mix to combine. Set aside for at least 20 mins for the flavours to meld.
  4. Combine all salad ingredients in a bowl.
  5. Heat 1 tbsp of oil in a fry pan over medium heat. Remove chicken from marinade and cook for 2-3 mins per side, until golden brown and cooked through.
  6. Remove chicken from fry pan onto a plate. Loosely cover with foil and allow to rest for 5 mins before serving.
  7. To assemble the gyros, you may need to cut the chicken thighs if they are very large.
  8. Get a pita bread (preferably warmed) and place some salad down the middle of the bread. Top with chicken and tzatziki. Fold or roll the wrap up.

Cheesy Pull Apart Garlic Bread & Creamy Pumpkin Fettuccine

With both my parents working this holidays, it’s been decided that I will be making dinner a lot more often in the next two weeks. At guides I’m currently working on getting my Life Skills Trefoil Two in cooking and one of the activities I have to do is to “Plan and Prepare a two course healthy meal”. So I figured I would kill two birds with one stone and make it for dinner one night. I decided to go with cheesy pull apart garlic bread for the appetiser and then a Stuffed Portobello mushroom with Creamy Pumpkin Fettuccine  for the main course.


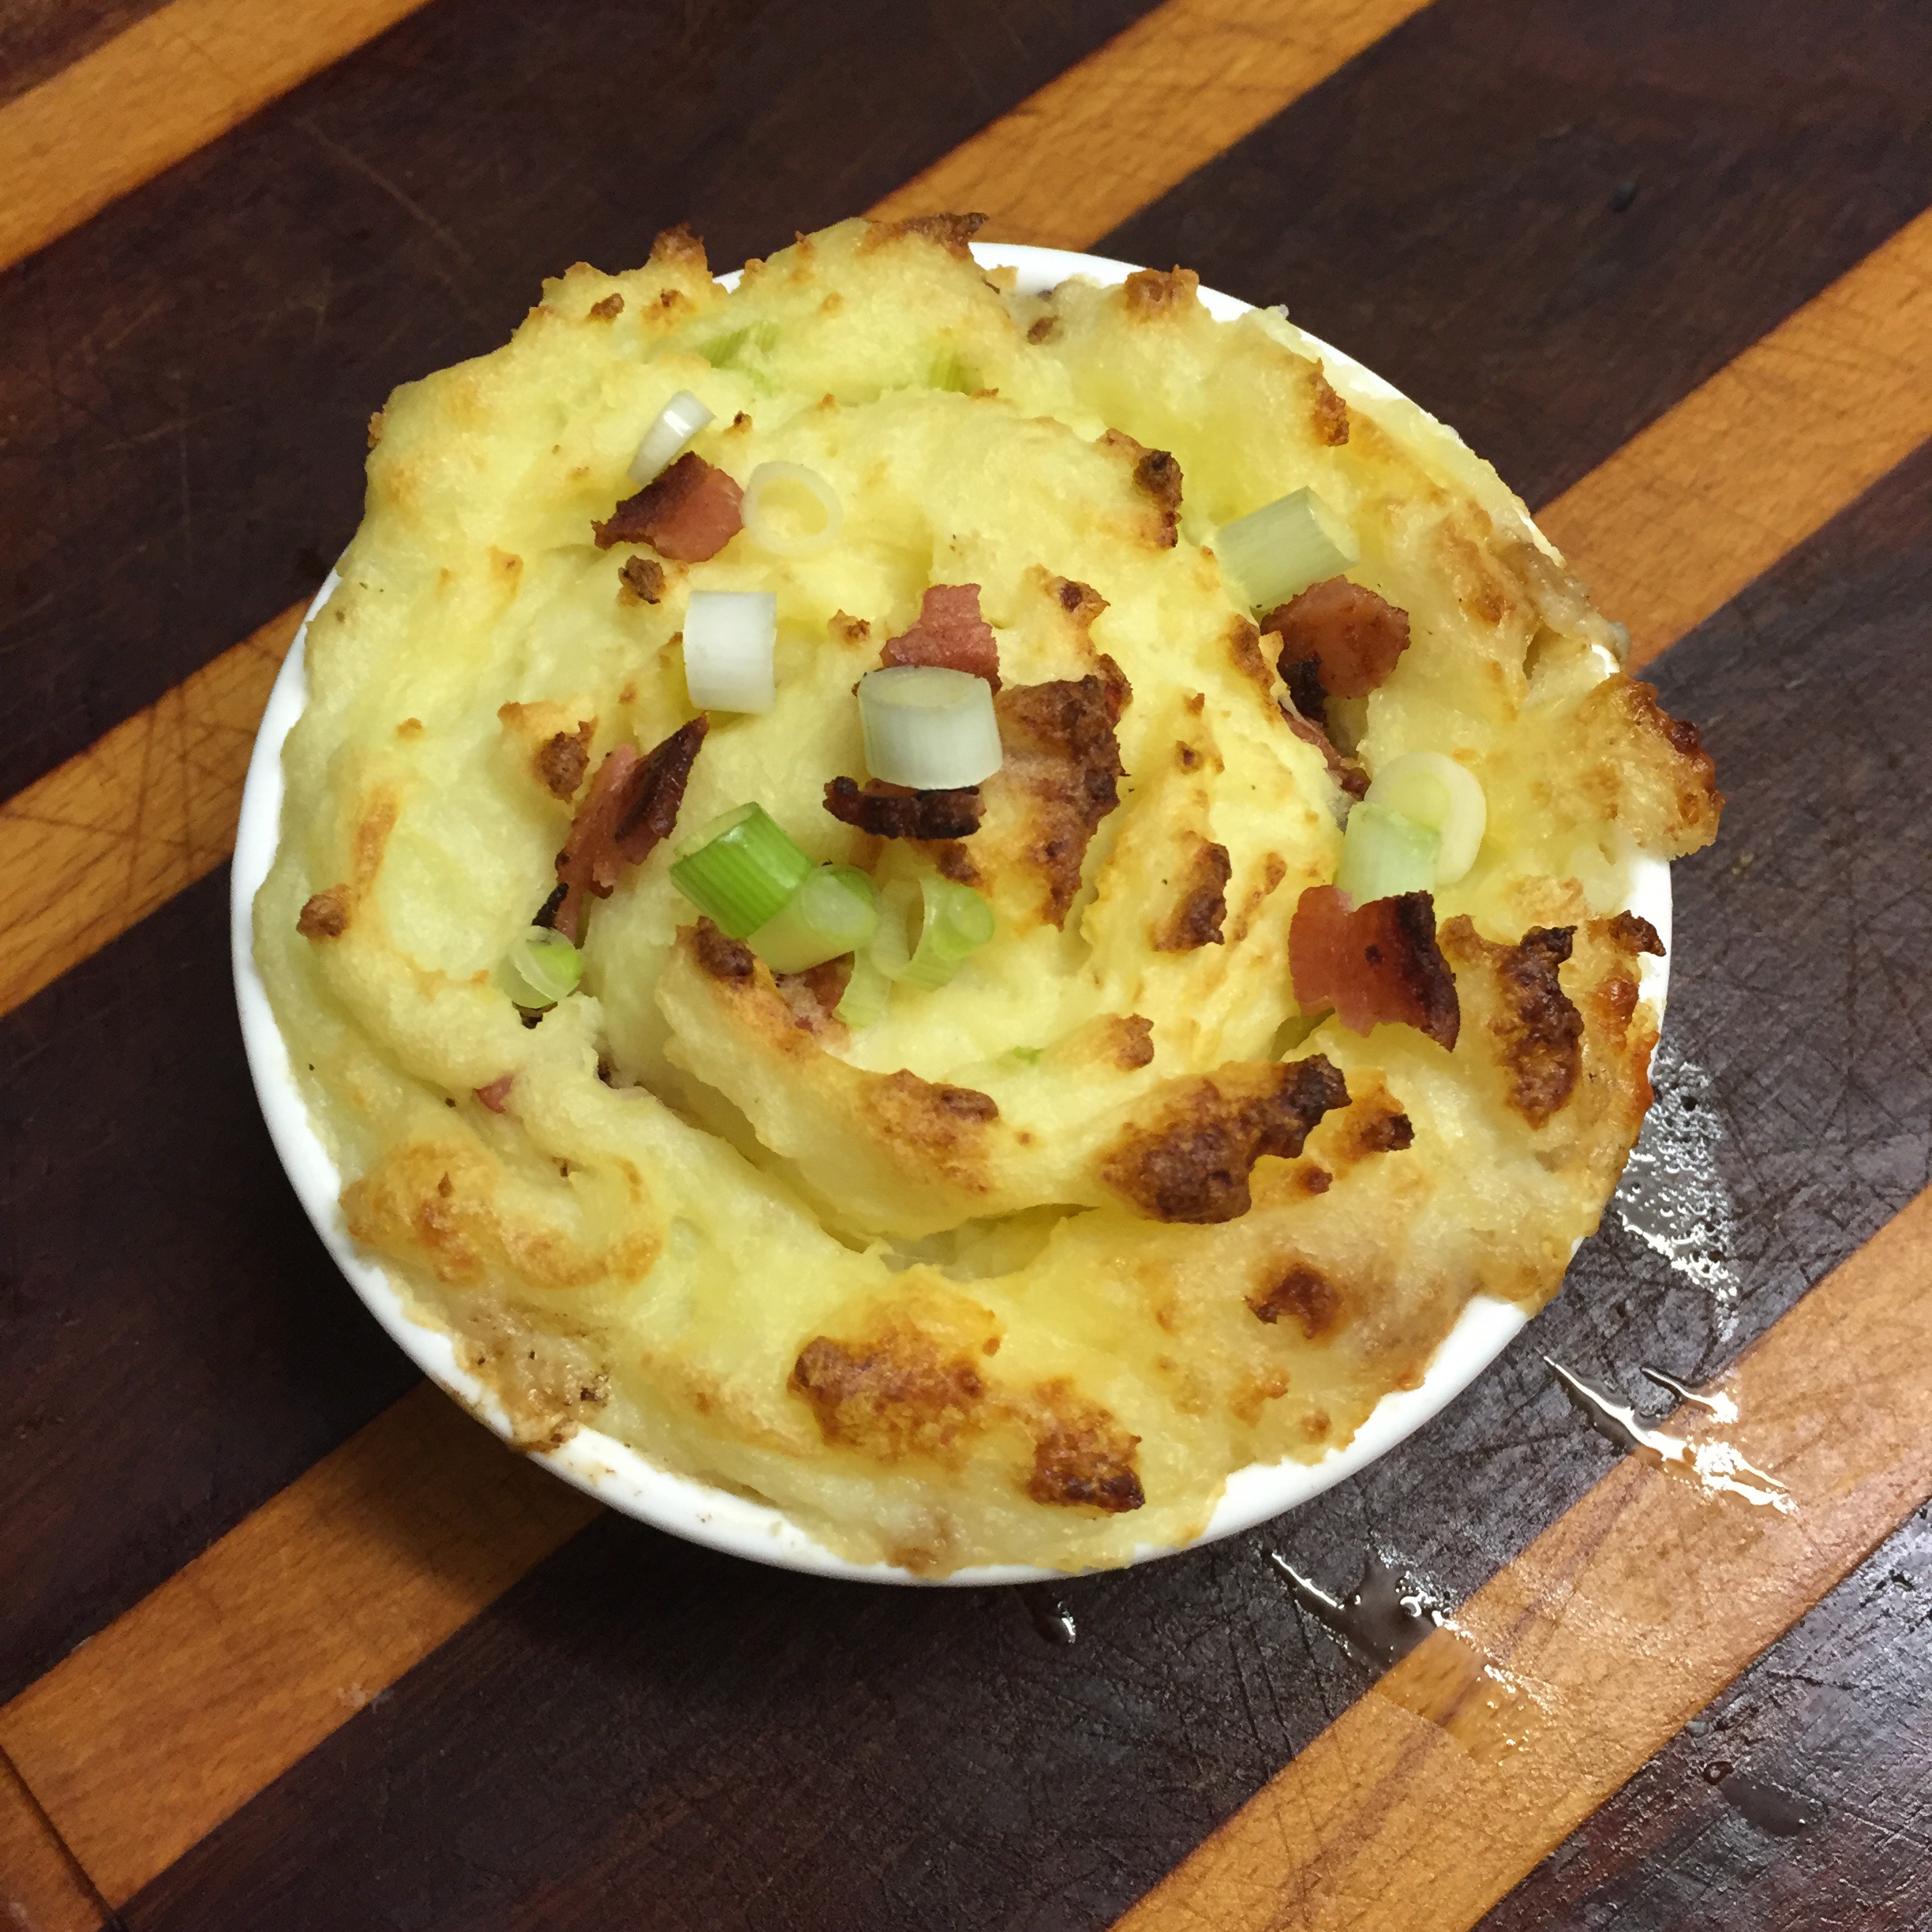
I’m pretty happy with it all turned out. The garlic bread was ultra cheesy, crunchy on the top and soft on the inside and the strands of cheese that stretched on seemingly forever were just perfect. Now I’m not exactly sure what constitutes as “healthy”, but the second definition on google is “not diseased.” which is the definition I will go with and state that this garlic bread was definitely not diseased. The recipe for the garlic bread does make a lot of garlic bread (which is totally not a bad thing) so I only baked about half and stored the rest in the fridge for the next day.


I had originally really wanted to do a cheesy pasta- like a stilton and pear gnocchi (recipe coming soon!!!) but I figured cheese on cheese probably won’t be classified as “healthy” hence I made this creamy pumpkin fettuccine which turned out better than I had hoped.


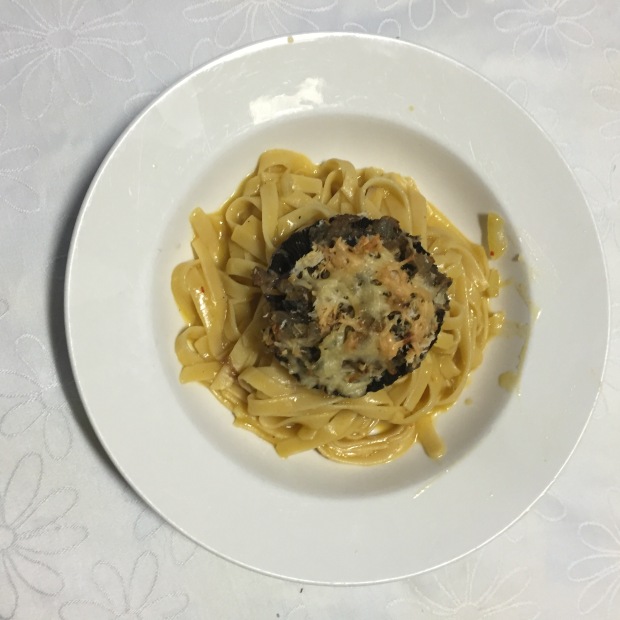
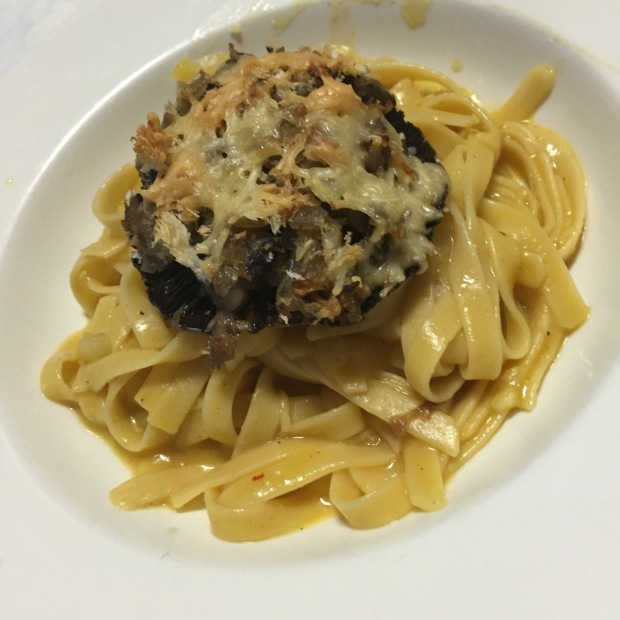
The Portobello mushrooms were ridiculously easy to the point that I don’t think you really need a recipe- just take a portobello mushroom, some diced onion, olive oil, parmesan cheese and bread crumbs. Dice the mushroom stalk and saute with the onion and olive oil, mix in the bread crumbs and stuff the mushroom with them. Sprinkle with some cheese and then bake for 5-10mins, until golden brown and crispy.


Cheesy Pull Apart Garlic Bread and Creamy Pumpkin Fettuccine

Yields: 6 servings of garlic bread, 4 servings of pasta
Fettuccine Total time: 30 mins

Ingredients:

For the bread:

  • 1/3 cup warm milk
  • 1/12 cup warm water
  • 1/3 packet of yeast
  • 1 tsps caster sugar
  • 1 tbsps olive oil
  • 1/3 large egg, beaten
  • 1 1/4 cups flour
  • 1/3 tsp Italian seasoning
  • 1 tsps garlic powder
  • ½ tsps salt
  • 2 tbsps grated parmesan
  • 50g mozzarella cheese, chopped into 5 cubes
  • 1/3 cup shredded cheddar cheese (or a mix of cheddar and mozzarella)
  • 1/3 tbsp melted butter

For the Garlic Bread Toppings:

  • 1 tablespoon melted butter
  • 1 teaspoon finely chopped parsley
  • ½ teaspoon garlic powder

For the Fettuccine:

  • 250g fettuccine pasta
  • 4 cups low sodium vegetable broth
  • 1 cup pumpkin puree
  • 1/2 cup white wine
  • 2 tbsps olive oil
  • 1/2 medium onion, chopped small
  • 3 cloves of garlic, peeled and minced
  • 1/2 tsp ground nutmeg
  • 1/8 tsp crushed red pepper flakes
  • 1 tsp salt to taste
  • 1/4 tsp pepper to taste
  • 120g sour cream
  • small bunch of parsley

Directions:

For the Garlic Bread:

  1. Pour the warm milk and water into a large bowl. Stir in the yeast, caster sugar, and olive oil. Allow the mixture to sit until it appears foamy, about 15mins.
  2. Add the egg, flour, italian seasoning, garlic powder, parmesan cheese, and salt to the the milk mixture. Mix until a dough is formed. Work the dough with your hands until all ingredients are evenly incorporated.
  3. Transfer the dough to a well oiled bowl. Over with glad wrap and allow to rise in a warm place for about 1 1/2- 2 hours.
  4. When the dough is almost ready, preheat your oven to 190*C. Grease a 5-inch round baking pan. Set aside.
  5. Once the dough has doubled in size, knead until the dough has softened and deflated a little. Break the dough into 5-6 even pieces.
  6. Flatten the dough and place a mozzarella cube into the center of each piece of dough. Pinch the edges together and roll the dough between your hands until the dough has formed a smooth ball. Place the dough balls into the the pan.
  7. Stuff the shredded cheddar into the gaps between the balls of dough. Brush melted butter over the top of the bread to help it to go golden brown.
  8. Bake the bread in the preheated oven for about 20-25mins or until the top has turned a golden brown.
  9. If desired, mix warm melted butter with the parsley and garlic powder, brush over the top of the bread.
  10. Serve the bread immediately out of the oven.

For the Fettuccine:

  1. Place all the ingredients except for the sour cream and parsley into a large, heavy pot.
  2. Place over high heat and bring to a rolling boil. As soon as it comes to a rolling boil, set a timer for 9 minutes. Stir the pasta with a wooden spoon as it cooks, frequently for the first two minutes and then constantly as it thickens.
  3. After 9 minutes, the pasta should be tender and the sauce will have thickened slightly. If the pasta is not yet fully cooked, cook for for another minute. Remove from heat.
  4. Stir in the sour cream until melted and combined. Allow the pasta to sit for 5 minutes. The pasta seems soupy at the moment, but it will thicken as it sits.
  5. Stir and taste. Add additional salt and pepper if desired.
  6. Divide between bowls and sprinkle parsley over the tops.

xoxo Vanessa

@LocknessDIY

Nutella Surprise Cupcakes with Raspberry Buttercream

This is quite possibly the most unhealthy food to come out of my oven this year, but trust me these cupcakes are so worth ruining any diet.  I made these cupcakes for my little sister’s induction ceremony at our Senior Guides Unit (shout out to her, so proud of you lil’ sis!!) and not to brag, but they went down a treat!

After a super fun campfire and some s’mores we figured we should wash it down with some supper. These cupcakes were so moist (I’m cringing at the word but it’s true) and packed a huge flavour punch. With a Nutella ‘surprise’ filling they’re the perfect balance of flavours- the sweet Nutella and the more tangy raspberry/lemon puree buttercream!

The cupcake base is a decadent chocolate topped with a fresh raspberry buttercream. The batter makes a super moist, ultra fluffy and is full of rich flavour. All this flavour comes from the eggs, egg yolk, melted butter, oil, and sour cream. All of these ingredients add intense moisture and flavour to the cupcake, and I definitely would not recommend skipping any of them. This is a recipe I suggest following to a T. Why mess with perfection?


Nutella Surprise Cupcakes with Raspberry Buttercream

Yields: 16 cupcakes
Prep time: 40mins
Baking time: 16-18mins

Ingredients:

For the cupcakes:

  • 3 tbsps canola oil
  • 115g unsalted butter, melted and slightly cooled
  • 1/4 cup Nutella
  • 1/4 cup Milo
  • 1 cup caster sugar
  • 2 large eggs + 1 large egg yolk, at room temperature
  • 1 tsp vanilla
  • 3/4 cup + 2 tbsps all-purpose flour, not packed
  • 1/2 tsp baking soda
  • 1 tsp baking powder
  • 1/2 cup unsweetened cocoa powder
  • 1/2 tsp salt
  • 1/2 cup full fat sour cream
  • 1/2 cup hot water

 For the raspberry buttercream:

  • 1 1/4 cups frozen raspberries (I think fresh would also work just fine)
  • 2 tbsps lemon juice
  • 250g unsalted butter, VERY soft
  • 1/2 tsp salt
  • 3 1/2 cups confectioners sugar (more if needed), sifted
  • 1 tbsp heavy cream (more if needed)
  • 1/4 cup fresh raspberries, for decorating (optional)

 For the Nutella filling:

  • 1/4 cup Nutella

Method:

For the cupcakes:

  1. Preheat oven to 180* fan forced. Line a muffin tray with cupcake liners.
  2. Melt the oil, butter, and Nutella and Milo in the microwave, in 30 second increments. Whisk until smooth and set aside to cool.
  3. In a large mixing bowl, beat together the eggs, yolk, sugar and vanilla until smooth. Add the cooled oil/butter/chocolate mixture and beat until smooth.
  4. Add half of the flour, cocoa powder, baking soda, baking powder, and salt to the mixture and half of the sour cream. Mix.
  5. Repeat the process until all the dry ingredients have been added, and mix until just combined. Quickly stir in the hot water. Be sure not to over mix!! Just stir until evenly combined.
  6. Divide the batter among your cupcake liners, filling them 3/4 of the way full. Bake for 16-18mins. Allow the cupcakes to cool COMPLETELY.
  7. Carve out small wells in each cupcake with a small, sharp knife. Fill each hole with 2 tsps of Nutella and cover with the carved out cupcake piece. Set aside and make the raspberry buttercream.

For the buttercream:

  1. In a small saucepan, bring the lemon juice and raspberries to a simmer over medium heat. Once simmering, stir the mixture occasionally, breaking up the berries with a wooden spoon, until the raspberries have become soft enough to mash effortlessly. It should look like raspberry jam. Once the mixture can coat a spoon, remove from heat. Allow mixture to cool completely before proceeding to the next step.
  2. Place the softened butter in a large mixing bowl. Beat the butter on medium-high until completely smooth (about 2mins).
  3. Add the cooled raspberry puree and beat until completely combined (about 1min). The mixture will look weird right now but that’s totally normal.
  4. Add in the icing sugar, one cup at a time, whilst beating on low. Once all the sugar has been added, add in the salt and cream. Beat on high speed for a full 2 minutes.
  5. Frost cooled cupcakes as desired.

and you should have some damn fine cupcakes.

xoxo Vanessa

Swedish Meatballs

Ikea: a furniture store that is absolutely in my top 100 places to eat.

I know you’ve probably heard it all before- ‘I LOVE IKEA’S SWEDISH MEATBALLS!!!’ But listen up folks, I really love Swedish meatballs. The only problem is that my nearest Ikea is a long way away, and obviously my parents aren’t going to drive me to Ikea for dinner. That’s where this recipe comes in!

These meatballs are absolutely delicious. The meatballs are tasty on their own, but add the creamy gravy, it’s unbelievable. oh my goodness, the heavenly gravy that these meatballs are smothered in with browned up meatball bits. Those meatball bits that stick to the bottom of the pan really take the gravy to the next level. I could drink it!

IMG_3415

If you decide to make these Swedish meatballs, make sure you snap a pic and tag @LocknessDIY on Instagram so I can like and comment on your photos. I love seeing all your creations!


SWEDISH MEATBALLS

Yields: about 4 serves

Ingredients:

  • FOR THE MEATBALLS
  • 1 tbs oil (Canola oil or olive oil is fine)
  • 1 onion, diced finely
  • 450g beef mince
  • 450g pork mince
  • 1/2 cup bread crumbs
  • 2 large egg yolks
  • 1/4 tsp ground allspice
  • 1/4 tsp ground nutmeg
  • salt and pepper, to taste
  • FOR THE GRAVY
  • 1/4 cup unsalted butter
  • 1/3 cup flour (plain or self-raising)
  • 4 cups beef broth
  • salt and pepper, to taste
  • 2 tbs chopped fresh parsley leaves

Method

  1. In a large bowl, combine the beef mince, pork mince, breadcrumbs, egg yolks, allspice, nutmeg and onion; season with salt and pepper, to taste. Mix well until combined. Roll the mixture into meatballs. It should make about 42 meatballs.
  2. Heat the oil in a skillet. Add the meatballs, in batches, and cook until all sides are browned, about 4-5 minutes. It’s no big deal if they’re still a little raw in the middle, you will be cooking them again. Transfer cooked meatballs to a paper towel-lined plate.
  3. For the gravy, melt your butter in the skillet. Whisk in flour until lightly browned (this should take about a minute). Gradually whisk in the beef broth and cook, whisking constantly, until it has thickened slightly, *1-2 minutes*. Stir in the sour cream and season with salt and pepper.
  4. Stir in your meatballs and cook, stirring gently every couple of seconds, until heated through and thickened. (about 8-10 minutes)
  5. Garnish with parsley and serve immediately

Be sure to comment below if you try this recipe and let me know what you think!

xoxo Vanessa

@LocknessDIY

Easy Beef and Broccoli!

Saturdays at the my house means it’s my turn to cook, but as a 15 year old girl, I don’t have that much skill or time when it comes to cooking, so it’s always a struggle looking for something I can cook that will take as little time and effort as possible, but won’t end in my sister yelling at me that this is the most disgusting thing she’s eaten in her entire life. Oh, and did I mention I’m also supposed to make it seem like it’s at least sort of healthy. Yea, it’s a bit of a trek. That’s where this super easy Beef and Broccoli comes in.

IMG_3206[1].JPG

It’s super quick and easy to make, plus it has a ton of flavour!


EASY BEEF AND BROCCOLI

Yields: about 4 servings

Ingredients:

  • 2/3 cup reduced sodium soy sauce
  • 1/2 cup chicken stock
  • 1/4 cup honey
  • 2 tablespoons rice wine vinegar
  • 2 tablespoons brown sugar, packed
  • 3 cloves garlic, minced
  • 1 tablespoon sesame oil
  • 1 tablespoon cornstarch
  • 1 teaspoon chilli sauce/sriracha, or more, to taste
  • 1 teaspoon ground ginger
  • 1/4 teaspoon red pepper flakes
  • 1 tablespoon olive oil
  • 500 gram flank steak, thinly sliced across the grain
  • 1 head broccoli, cut into florets
  • 1/4 cup water

Method:

  1. So you’re going to take your soy sauce, chicken stock, honey, vinegar, brown sugar, sesame oil, cornstarch, Sriracha, ginger, red pepper flakes and 1/4 cup water and whisk it all together in a medium sized bowl. Set it aside for now.
  2. Heat some oil in a large skillet over medium high heat. Take your garlic and put it on your skillet, making sure you keep moving it around so that it doesn’t burn. Once the garlic is browned, add steak and cook until browned, flipping it over once or twice.
  3. Add your broccoli, and about 3-4 minutes later add your soy sauce mixture, stirring until thickened. If your sauce isn’t getting thicker, it means you probably haven’t added enough cornstarch so add a little more a teaspoon at a time.
  4. Serve immediately with rice.

It really is that easy! The BEST beef and broccoli made in less than 15 minutes!

xoxo Vanessa

@LocknessDIY

Loaded Shepherd’s Pie

Shepherd’s Pie aka Cottage Pie. The glory of potatoes as a crust. Mashed potatoes. as. a. crust. Possibly the best thing since sliced bread. To be quite honest, everyone makes shepherd’s pie differently. It’s a household recipe staple, and the best on a cold winters night.

As you probably know, I try to avoid unnecessary work wherever possible so this recipe uses gravy mix as seasoning, halving the time it takes to make the pie, and halving the effort required. Plus none of that delicious meaty mince flavour is sacrificed! It’s a win-win.


LOADED SHEPHERD’S PIE

Yields: 4 serves

Ingredients:

  • 500g mince beef
  • 1 cup (about 80g) mushrooms, sliced
  • 1/2 a medium-sized onion, diced
  • 1 tsp salt
  • 3 tbs brown gravy mix
  • 1/2 tsp garlic powder
  • 4 large-ish potatoes, peeled and diced
  • 1/2 cup milk
  • 3 tbs margarine/butter
  • 4 spring onions, chopped
  • 1/2 cup shredded sharp cheddar cheese*
  • 4 strips crisp cooked bacon, diced

*You can use more cheese and any variety you like

Method:

  1. Brown the beef, onion, and mushrooms over medium heat in a large skillet. Drain fat and season with gravy mix, salt, and garlic powder. Stir well and set aside.
  2. Place diced potatoes in a saucepan. Cover with water and add about 1-2 tsp of salt. Boil until tender. Drain well.
  3. Mash potatoes with milk and margarine, until potatoes are not lumpy. Add the spring onion and bacon- you can save a small amount to garnish, if desired. Stir in cheese- you can also save some of this if you want.
  4. Preheat oven to 190*C.
  5. Place the mince beef mixture in a 22cm deep dish pie pan, or several smaller pie pans. Distribute the meat evenly across the bottom.
  6. Top with mashed potatoes, completely covering the meat.
  7. Bake for about 30 mins or until the potatoes begin to get brown on the edges and peaks.
  8. Remove from oven and garnish.

YAY! You did it!!! If you decide to make this Loaded Shepherd’s Pie, make sure you tag me in your photos @LocknessDIY on Instagram! I love seeing all of your creations!

xoxo Vanessa

@LocknessDIY


Churro Cupcakes with Cinnamon Cream Cheese Frosting

Just in case you are completely uneducated at life and don’t know what a churro is it’s kinda like a cinnamon doughnut, but in crunchy stick form, so it’s like 10 billion times better. If you ever go to Disney Land make sure you get one, sure they’re like $10 but it’s totally worth it. kinda.

Now I love churros, but they’re not exactly the cheapest and most accessible food. Deep frying food is a lot of work in my opinion and so I figured this was a pretty great solution. In addition to this, I’m never quite sure how to pronounce “churro” which has led to many awkward encounters whenever I try to order them. Plus I get into fights with people over how to pronounce it every time churros are mentioned, so making these myself will save me from all that hassle.

So these churro cupcakes have a more cinnamon-y taste than anything, but to me that sums up what a churro is pretty well so I’m going with it. These cupcakes are also fairly heavy, but paired with the cinnamon cream cheese frosting they taste just great!


Churro Cupcakes with Cinnamon Cream Cheese Frosting

Yields: about 16 cupcakes

Ingredients:

  • For the cupcakes
  • 1 1/2 cups all-purpose flour
  • 1 1/2 teaspoons cinnamon
  • 1 1/2 teaspoons baking powder
  • 1/2 teaspoon salt
  • 1/2 cup (120g) unsalted butter, at room temperature
  • 1 cup sugar
  • 2 eggs
  • 2 teaspoons vanilla extract
  • 1/4 cup vegetable oil
  • 1/2 cup milk
  • For the frosting
  • 120g cream cheese, at room temperature
  • 4 tablespoons unsalted butter, at room temperature
  • 2 cups confectioners’ sugar
  • 1 teaspoon vanilla extract
  • 1 teaspoon cinnamon

Method:

To make the cupcakes:

  1. Preheat the oven to 180 degrees fan-forced. Line a muffin tin with cupcake liners; set aside.
  2. In a medium-sized bowl, combine the flour, cinnamon, baking powder, and salt. Set aside.
  3. In a large mixing bowl, cream the butter and sugar until light and fluffy. Add the eggs, one at a time, and mix until just combined. Stir in the vanilla and oil.
  4. Sprinkle 1/3 of the flour mixture into the mixing bowl, and gently stir until barely combined. Add half of the milk, mixing until just combined. Repeat with the remaining flour mixture and milk, ending with the flour. Do not over mix!!!
  5. Fill each cupcake liner with 2 tablespoons of batter, or until the liner is about 3/4 full.
  6. Bake the cupcakes for about 15 mins, or until a toothpick  inserted in the centre comes out with one or two crumbs clinging to it. Allow the cupcakes to cool completely before frosting.

To make the frosting:

  1. Cream the butter and cream cheese together in a large mixing bowl. Add the sugar, one cup at a time, beating well between each addition. Stir the cinnamon through until well combined. Stir in the vanilla. Beat the mixture well, until light and fluffy.
  2. Pipe onto cupcakes, and sprinkle with a little cinnamon sugar and drizzle with caramel sauce if desired.

YAY! You did it!

xoxo Vanessa

@LocknessDIY