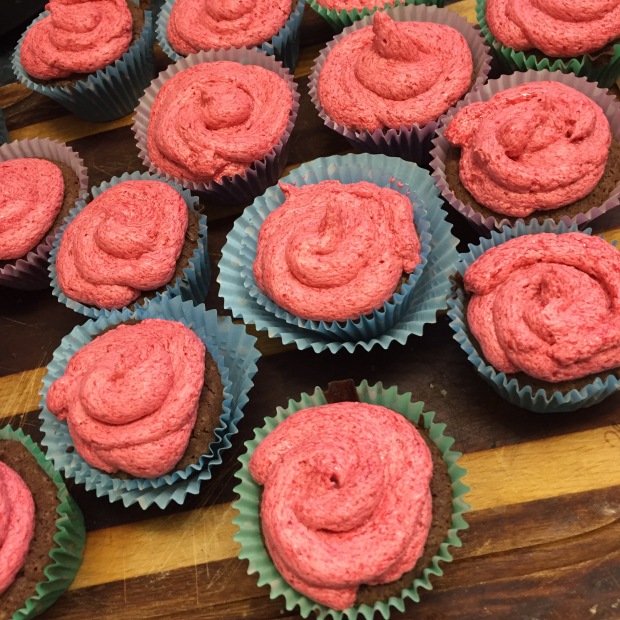
This is quite possibly the most unhealthy food to come out of my oven this year, but trust me these cupcakes are so worth ruining any diet. I made these cupcakes for my little sister’s induction ceremony at our Senior Guides Unit (shout out to her, so proud of you lil’ sis!!) and not to brag, but they went down a treat!

After a super fun campfire and some s’mores we figured we should wash it down with some supper. These cupcakes were so moist (I’m cringing at the word but it’s true) and packed a huge flavour punch. With a Nutella ‘surprise’ filling they’re the perfect balance of flavours- the sweet Nutella and the more tangy raspberry/lemon puree buttercream!

The cupcake base is a decadent chocolate topped with a fresh raspberry buttercream. The batter makes a super moist, ultra fluffy and is full of rich flavour. All this flavour comes from the eggs, egg yolk, melted butter, oil, and sour cream. All of these ingredients add intense moisture and flavour to the cupcake, and I definitely would not recommend skipping any of them. This is a recipe I suggest following to a T. Why mess with perfection?
Nutella Surprise Cupcakes with Raspberry Buttercream
Yields: 16 cupcakes
Prep time: 40mins
Baking time: 16-18mins
Ingredients:
For the cupcakes:
- 3 tbsps canola oil
- 115g unsalted butter, melted and slightly cooled
- 1/4 cup Nutella
- 1/4 cup Milo
- 1 cup caster sugar
- 2 large eggs + 1 large egg yolk, at room temperature
- 1 tsp vanilla
- 3/4 cup + 2 tbsps all-purpose flour, not packed
- 1/2 tsp baking soda
- 1 tsp baking powder
- 1/2 cup unsweetened cocoa powder
- 1/2 tsp salt
- 1/2 cup full fat sour cream
- 1/2 cup hot water
For the raspberry buttercream:
- 1 1/4 cups frozen raspberries (I think fresh would also work just fine)
- 2 tbsps lemon juice
- 250g unsalted butter, VERY soft
- 1/2 tsp salt
- 3 1/2 cups confectioners sugar (more if needed), sifted
- 1 tbsp heavy cream (more if needed)
- 1/4 cup fresh raspberries, for decorating (optional)
For the Nutella filling:
Method:
For the cupcakes:
- Preheat oven to 180* fan forced. Line a muffin tray with cupcake liners.
- Melt the oil, butter, and Nutella and Milo in the microwave, in 30 second increments. Whisk until smooth and set aside to cool.
- In a large mixing bowl, beat together the eggs, yolk, sugar and vanilla until smooth. Add the cooled oil/butter/chocolate mixture and beat until smooth.
- Add half of the flour, cocoa powder, baking soda, baking powder, and salt to the mixture and half of the sour cream. Mix.
- Repeat the process until all the dry ingredients have been added, and mix until just combined. Quickly stir in the hot water. Be sure not to over mix!! Just stir until evenly combined.
- Divide the batter among your cupcake liners, filling them 3/4 of the way full. Bake for 16-18mins. Allow the cupcakes to cool COMPLETELY.
- Carve out small wells in each cupcake with a small, sharp knife. Fill each hole with 2 tsps of Nutella and cover with the carved out cupcake piece. Set aside and make the raspberry buttercream.
For the buttercream:
- In a small saucepan, bring the lemon juice and raspberries to a simmer over medium heat. Once simmering, stir the mixture occasionally, breaking up the berries with a wooden spoon, until the raspberries have become soft enough to mash effortlessly. It should look like raspberry jam. Once the mixture can coat a spoon, remove from heat. Allow mixture to cool completely before proceeding to the next step.
- Place the softened butter in a large mixing bowl. Beat the butter on medium-high until completely smooth (about 2mins).
- Add the cooled raspberry puree and beat until completely combined (about 1min). The mixture will look weird right now but that’s totally normal.
- Add in the icing sugar, one cup at a time, whilst beating on low. Once all the sugar has been added, add in the salt and cream. Beat on high speed for a full 2 minutes.
- Frost cooled cupcakes as desired.
and you should have some damn fine cupcakes.
xoxo Vanessa


 If you give these cookies a go make sure you let me know how it goes and tag me on Instagram @LocknessDIY !!